How to Make the Most of Volume Backtesting
Forward-testing — watching a market unfold in real time — is slow. A single trading day takes 6.5 hours to play out, and most of it is dead air between setups. If you only ever practice in real time, you might see a handful of real trade setups a week.
Backtesting flips that. Volume replays real historical market data, and you control the clock. Sit through the boring stretches at hundreds of times normal speed, then drop back to real-time (or pause entirely) right as your setup develops. The chart, the price action, and the outcome are all real — you're just choosing how fast you experience them. That's the whole edge: the same reps that would take you a trading year in the real market can happen in an afternoon.
Getting the most out of that requires three things: an account to trade with, a session to trade in, and fluency with the controls that move time. Here's how each one works.
Step 1: Set Up a Paper Account
Everything in Volume happens inside a paper account — a virtual balance you trade against. You can run several at once (for different markets, balances, or strategies) and switch between them freely.
- From
/dashboard, click the New Account tile (or New account, depending on your dashboard layout) under "Your accounts." - Enter an Account Name (3–50 characters) — something descriptive like "Breakout Strategy" or "Swing Test."
- Set your Account Starting Balance. It's clamped automatically between $100 and $50,000 as you type.
- Choose an Account Type: STOCKS, FOREX, FUTURES, or CRYPTO. MULTI-MARKET is also listed but requires a Pro subscription — selecting it locks the Create Account button and shows an upsell linking to
/store. - Click Create Account. A confirmation toast appears and the account is added to "Your accounts," ready to start a session.
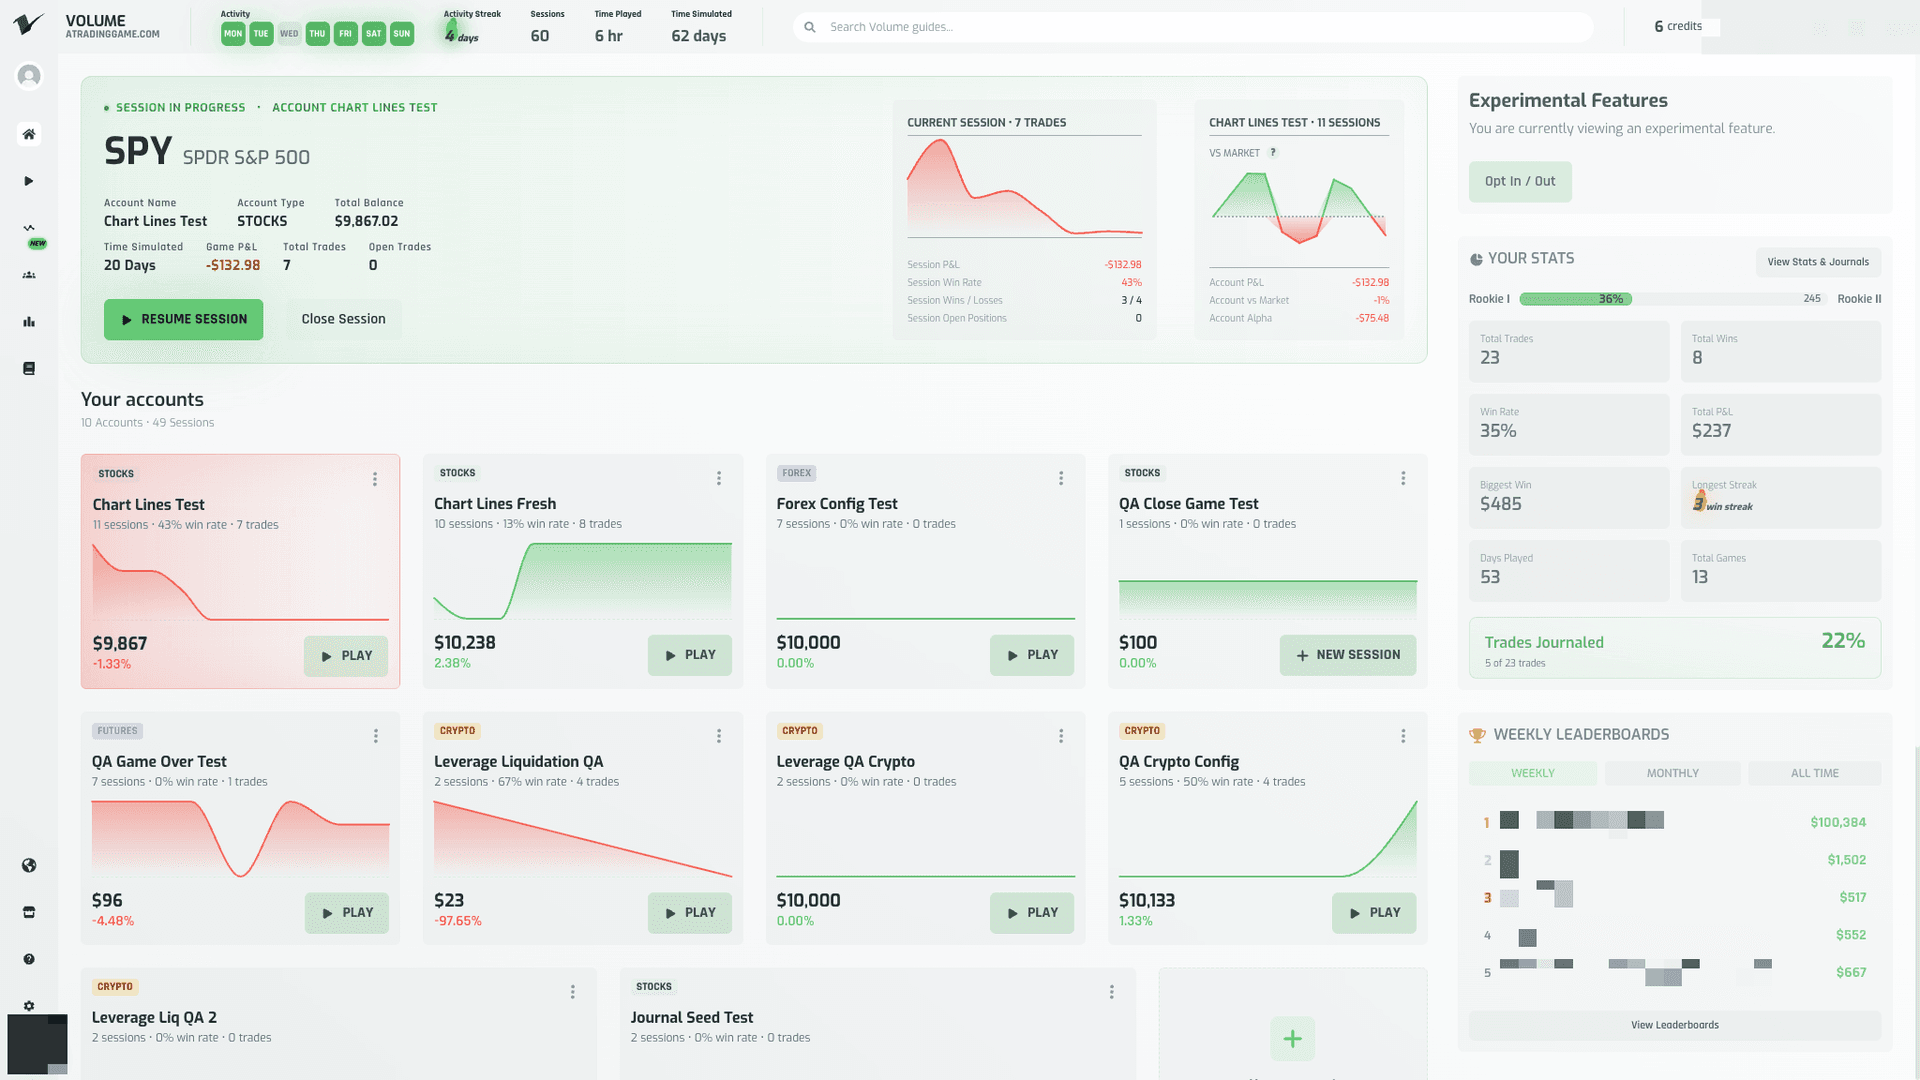
Why separate accounts matter: Keeping a dedicated account per strategy (or per market) means your win rate, P&L, and session history for "testing breakouts on FOREX" never gets muddied with "practicing SPY swing trades." Each account card tracks its own balance history, sessions played, and win rate independently, so your stats stay meaningful.
Once an account exists, you can manage it any time by right-clicking its row (on the experimental dashboard's "All Accounts" panel) or opening its card menu (on the classic grid layout): Set as Active Account, Edit Name, Close Account, or Delete Account. Closing an account retires it (moves it to the bottom of the list marked closed) without deleting its history; deleting removes it permanently.
Step 2: Start a Session
A session is one playthrough on an account — you trade a ticker starting from a point in market history, at whatever speed you choose. There are two ways to start one.
Option A: New Session (full control)
- On an account card with no active session, click NEW SESSION (or PLAY if a session is already waiting to resume).
- The Create New Game modal opens with your Game Setup: account name, start balance, starting ticker, start date, market type, and a derived Difficulty.
- On a free account, Starting Ticker and Start Date stay on RANDOM — this is intentional. A random entry point stops you from cherry-picking easy charts and forces you to develop skills that hold up across different conditions. Difficulty shows Competitive.
- Click Start Game. You're routed straight into the gameroom with the chart and trade panel loaded.
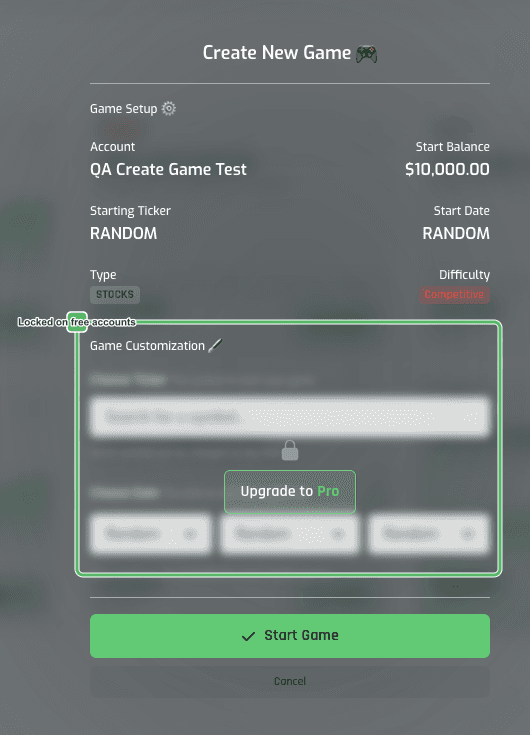
Pro accounts get a fully interactive Game Customization section instead of a locked one:
- Choose Ticker: type a symbol in the search box (e.g. "RDDT") and pick it from the results. "Starting Ticker" updates immediately.
- Choose Date: pick a Year, Month, and Day. For symbols with limited history, the dropdowns automatically clamp to the range the symbol actually has data for — picking a Year narrows the Month options, and picking a Month narrows Day options to real trading days.
- As soon as a specific Year+Month is chosen, Difficulty flips from "Competitive" to "Practice" — you're no longer facing a fully random draw.
- Clearing the ticker search box reverts "Starting Ticker" back to RANDOM while keeping your date choice.
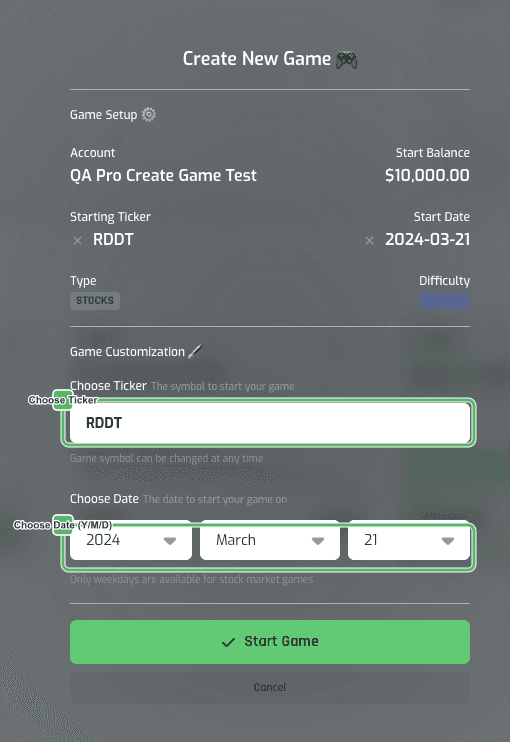
Use customization deliberately: pick a known earnings date or a historic volatility spike when you want to drill a specific scenario, and go back to RANDOM when you want unbiased, general practice.
Option B: Quick Play (fastest way in)
On a brand-new account's first visit to /dashboard, once the welcome tour finishes, a "Ready to test your strategy?" modal appears automatically.
- Click Play now to start a session immediately — no manual account creation required.
- Or click Maybe later to dismiss it; nothing is created, and the modal won't reappear on future visits.
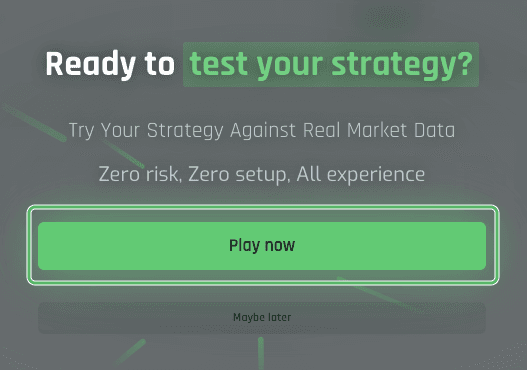
Quick Play is the fastest path from signup to your first candle — useful when you just want to get a feel for the platform before setting up a dedicated strategy account.
Closing a session: from the gameroom, open Preferences → MORE... → Close Game, then confirm. This returns you to the dashboard; the account and its balance are retained so you can start a fresh session later.
Step 3: Master the Time Controls
Time control is the actual mechanic that makes backtesting faster than practice trading — everything else in the gameroom exists to support it.

Speed buttons
Three speed buttons sit in the gameroom header: Realtime, Fast, and Very Fast. Click one (the active one is highlighted), or use the keyboard shortcuts:
| Shortcut | Speed |
|---|---|
| Space or Ctrl/Cmd+1 | Realtime |
| Ctrl/Cmd+2 | Fast (default 120×) |
| Ctrl/Cmd+3 | Very Fast (default 360×) |
These shortcuts only fire when focus is on the page background — click into a text field like the trade Amount input first, and the same keys type normally instead of changing speed.
If the game is currently paused, clicking a speed button (or its hotkey) both sets the speed and resumes play in a single action.
Customizing Fast and Very Fast
The default multipliers (120× and 360×) don't have to stay defaults:
- Open Preferences → expand GAME SPEED.
- Each of Fast and Very Fast has an editable multiplier field, valid from 2 to 999.
- Enter a valid value (e.g.
300) and click Save Changes — from then on, the Very Fast button and itsCtrl/Cmd+3shortcut both apply your custom speed. A value outside 2–999 shows an inline "Must be 2–999" error and disables Save (Discard still works, snapping the field back). - Restore Defaults resets both fields to 120X/360X as an unsaved draft — Save Changes to persist it, or Discard to abandon it.
Push Very Fast as high as you're comfortable reading candles at. The point of raising it is to spend less time waiting through quiet, low-information stretches of the chart.
Pausing automatically
You don't need to remember to hit pause before checking something — the clock freezes the instant you open any modal (Preferences, Report a Bug, the Close Game confirm, or a Journal Entry) and resumes the moment you close it, at whatever speed was active before. This means you can stop mid-session to review your notes or adjust settings without losing your place or accidentally missing a candle.
Manual skip
Next to the speed buttons, D/H/M fields let you jump forward by days, hours, or minutes directly — useful for clearing long, uneventful stretches like premarket instantly instead of fast-forwarding through them. When the market is closed (the timeline badge reads PREMARKET or AFTERMARKET), hover the badge to reveal a "Skip to Premarket" or "Skip to Open" action that jumps straight to the start of the next trading window, instead of skipping hour by hour by hand.
Step 4: Read the Chart at the Right Resolution
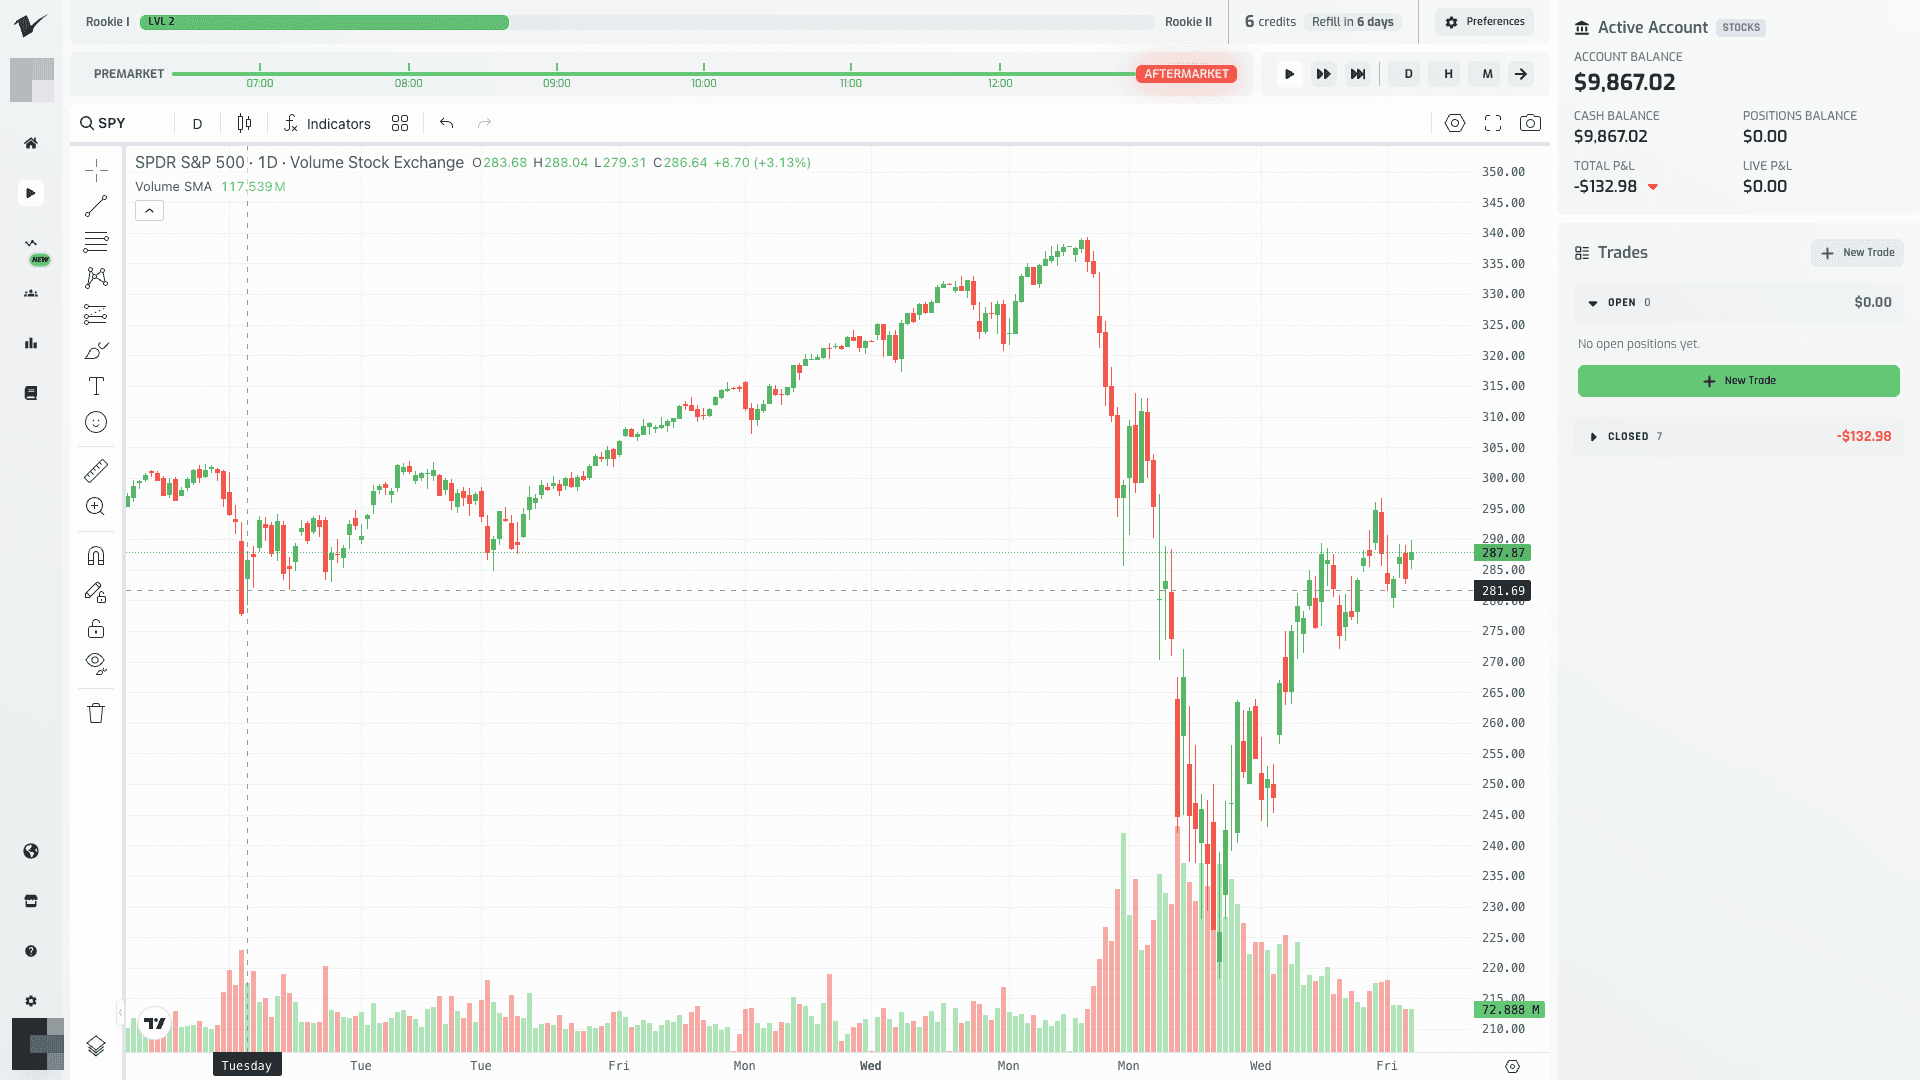
Backtesting isn't just about compressing time — it's about looking at the right zoom level for what you're doing. Volume's chart interval switcher lets you change resolution without breaking your session.
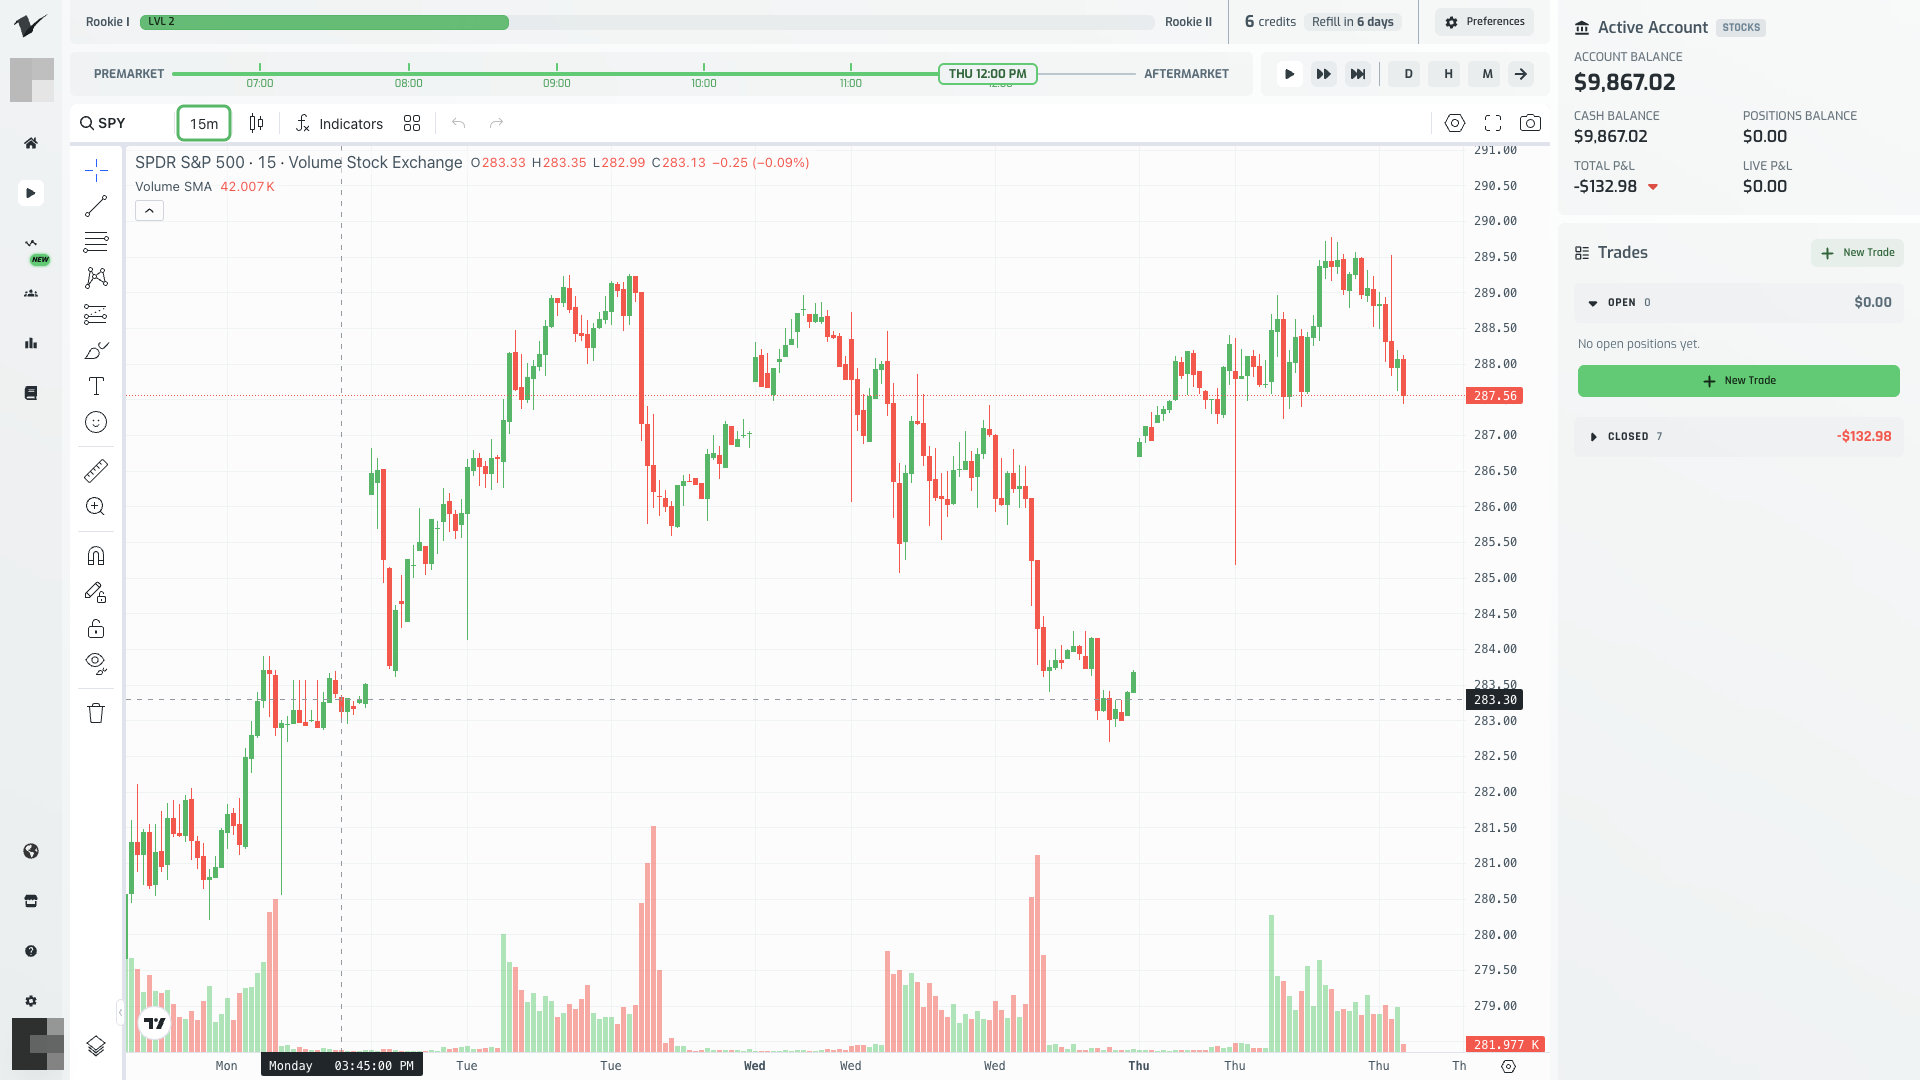
- Click the interval button in the chart's top toolbar (it shows the current interval, e.g.
15m). - A dropdown lists Minutes (1, 3, 5, 15, 30, 45), Hours (1, 2, 4), and Days (1 day; week/month are greyed out).
- Click any interval — the chart repaints immediately with that interval's candles, right up to the current game clock. No reload needed.
A practical way to use the different resolutions:
- Zoom out (1D, 4H) first to see the broader trend and where you are relative to major support/resistance.
- Zoom to your working timeframe (15m is the default) to plan entries and exits.
- Zoom in (1m, 5m) right around an entry to fine-tune timing once your setup is confirmed.
A few behaviors worth knowing:
- Switching away and back (e.g. 15m → 1D → 15m) preserves the full candle history — there's no gap where the earlier interval's live bars were.
- While the game plays at any speed, the newest candle on whatever interval you're viewing extends live as time advances, and the O/H/L/C readout above the chart updates with it — you never need to manually refresh.
- Your last-selected interval is remembered across a reload. If you left the chart on 15m, it reopens on 15m the next time you resume the session.
- When you open the trade ticket, its header price matches the current candle's close on the chart, so what you see is what you'd actually pay to enter.
Practical Tips for Structured Practice
- Use RANDOM starts for general reps. Random tickers and dates are what force pattern recognition that generalizes — save specific ticker/date customization (Pro) for drilling a known scenario like an earnings gap.
- Don't run Very Fast blind. High speed is for clearing dead time, not for skipping through the actual setup you're trying to trade. Drop to Realtime (or pause) once price approaches a level you're watching.
- Zoom out before you zoom in. Check the daily or hourly picture before committing to a 15m or 1m entry — a resolution that looks like a breakout up close can be noise on the bigger chart.
- Keep accounts separated by strategy. Since each account tracks its own win rate and balance history independently, one account per strategy or market keeps your stats honest about what's actually working.
- Let auto-pause work for you. Because opening Preferences or a Journal entry freezes the clock automatically, there's no penalty to stopping mid-session to think — use it liberally rather than rushing decisions to "not lose time."